Sunday, May 19, 2013

School Cupcakes

My children's school was having a fundraiser this past week and needed baked goods.  I made cupcakes using the school colors (gold, navy blue and primary red) and the logo.  

These gold cupcakes have an edible image of the school logo- go Redhawks!


Then I made little girls and boys in their red school uniform polo collars.  
These were really fun to make.    


Then I made a few cupcakes with navy blue sixlets, on top.  If you are selling anything at a school function, you need it kid friendly.  I wanted some kind of candy on top of some of the cupcakes.  


Packaged and ready to go!  


Monday, May 6, 2013

Owl Birthday!

I made this cake for my two year old daughter who loves birds.  
She especially loves Owls.  

 The top is a 6", bottom tier is a 8" cake. 

On this cake I tried modeling chocolate instead of fondant.   The cake shows all use modeling chocolate, and although it hardens a lot quicker, I found it frustrating to use.  The chocolate is rock hard, then you warm it in your hands, and can mold it until your hands get too warm and the chocolate starts melting on your palms.  So making the owls was a messy process.  The pieces seem more fragile also.  I think I will use modeling chocolate when I need to have pieces  harden quickly, but if I have the time, I think fondant and gumpaste works better for figures. 

On the second owl I mixed the modeling chocolate with the fondant, 1:1 which I had read you could do as well.  I did not like it at all, don't try it- it was very dry and crumbly yet greasy.  It was a learning process and I ended up making a total of 4 owls for this one cake, I settled on my favorite two.  


The cake was surrounded with trees, and flowers made of cheerful colors, fun for a two year old birthday!


Tuesday, April 30, 2013

Woodworker's Cake

My dad's birthday was this week.  He is really talented at building things out of wood like food trays, cutting boards, chairs...houses.  For his birthday I wanted to make a cake stump of wood, and add different wood making tools around it.  


Every builder has plans, his plans were to have a Happy Birthday.  


I used tools to spell out "Dad".
A clamp (I've been told you can never have too many of these), nails, & a tape measure.   

 My dad loves his chocolate, so I used chocolate frosting, in a star tip to cover the sides of the cake.  Then I added the individual pieces of bark.  The "bark" was made out of modeling chocolate, each one hand made and textured to look like bark. I dusted them with a dark brown petal dust to add depth.  


I added a saw blade, and bits of chocolate shavings, and brown sugar saw dust.  The stumps ring piece was made several days in advance so it could be stiff and hard (like wood :).  I hand painted the rings with different shades of brown petal dust.  

It is always so fun to make birthday cakes, and to make them personal for the individual!


Sunday, April 28, 2013

Country Wedding

Last week I was able to make a wedding cake for my sister in law. 
 She wanted a country style cake that had a rustic, simple feel to it.  


 I also made cupcakes for the dessert buffet.  
After piping 350 cupcakes, my right hand was shaking.  
I have a new appreciation for bakers who pipe all day long. 

Vanilla, Pumpkin and Chocolate cupcakes on dessert buffet. 

Pumpkin cupcakes with a frilled cinnamon frosting.  

Chocolate cupcakes with handmade chocolate roses.  

Vanilla cupcakes topped with fondant daisies
It was so much fun to take on this project.  I am so glad the bride loved it. 


Friday, April 5, 2013

Hulk and Spiderman: Trial and Error

This cake was a learning cake.  I made this for my nephew.  He wanted Hulk and Spiderman to be incorporated into his cake.  I came up with this crazy idea...


Hulk is below and has one large skewer going through him, below and above him to connect the two cakes.  
I used a large straw filled with white chocolate to hold the bottom of Hulks skewer.  Once the chocolate hardened he should be  secure.  I made the top Spiderman cake using a Cake dummie so that it would be lighter and easier to deal with the weight of the cake. I didn't factor in the weight of my fondant made Spiderman.  


Hulk looks like he has a lot of muscles, but really they are just fake.  
He was not ready to support this cake.  I made him about a week before the cake, so he was completely hardened.  Then I hot glued his hands and head to the bottom of the Spiderman cake (which the cake was also skewered onto Hulk also). The weigh of the Spiderman figure was too much for one side of the cake though.  The cake lasted about 4 hours, after delivery I found out that it gave way to gravity and started tilting too much for comfort.  


The birthday boy got to see his cake, and enjoy it, but then to save the cake for the party later on the day, extra support had to be added to keep it together.  That really is just so sad, I wish I never made mistakes, but I do.  The idea seemed like a good idea in my mind, but realistically just didn't last.  Spiderman should have been made out of modeling chocolate which weighs lighter, and given the Hulk, two skewers, one in both feet, not just the one.  


Tuesday, March 12, 2013

How to carousel...

I apologize for not having very many photographs.  When I planned to make this cake I knew I wanted to write up a tutorial about it since it was hard to find one myself.  However as soon as I got my hands on the fondant, I forgot about my camera and went to work.  Here is what I do have.  

First thing I made was the top.  I used a 8" cardboard cake circle, on top of it I hot glued a cardboard semicircle, using a cereal box (so it was cardboard, yet bendable).  This created the canopy top.  
Then I created the six sides of the canopy, and "glued" them on to the edge of my 8" cake circle.  I had the canopy dry for two days on a smaller sized can, to allow the edges to dry hanging off the edge.  You can't see it in this photo, but I also hot glued a 1 1/2" circle (the diameter of your column opening) of Styrofoam to the center of my 8" cake board.  This Styrofoam will be used later to connect the column to the canopy


The base of the cake was actual cake.  I covered it like any other cake.


Then I pushed in my center column.  I molded fondant around a clean empty paper towel ring to create this column. It was made several days before, so that the bottom and top lips were allowed to harden.  The bottom  six or so inches were left empty since that was the area that would be inserted into the cake.  

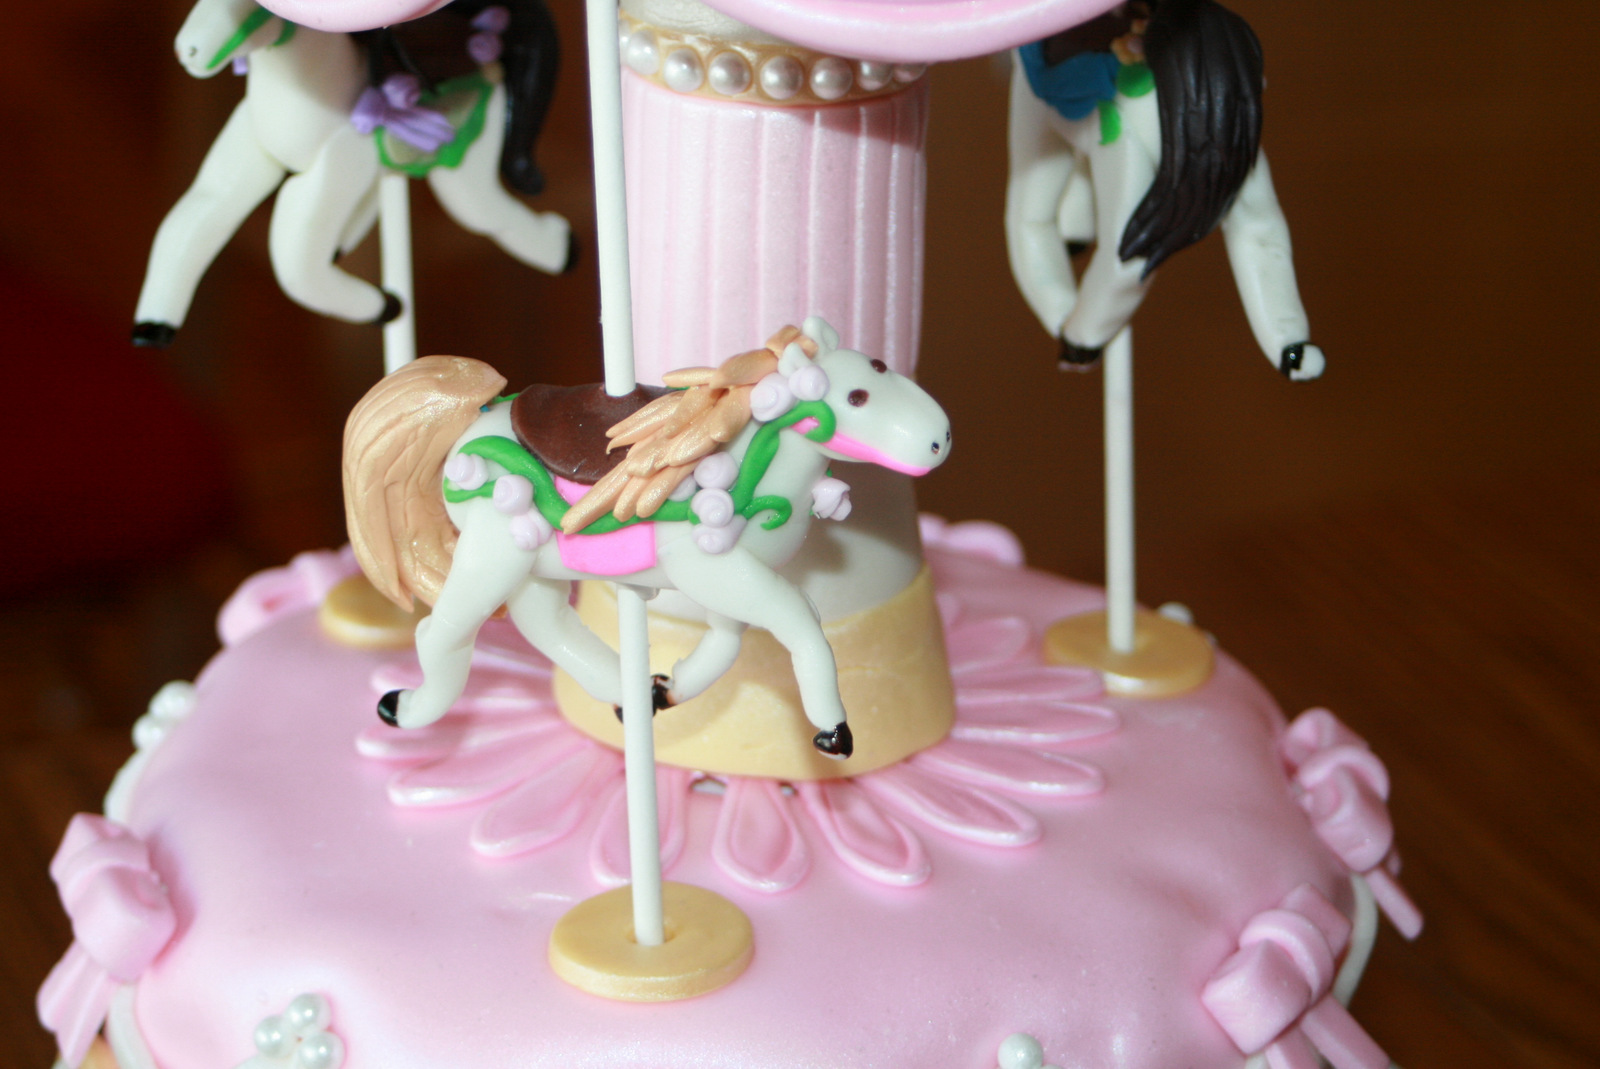
The three gold rings on the cake were supports for my horses.  These too were made in advance so that they were hardened and would hold the horse dowels in place.  

Once the column was in place I put my horse dowels in my golden supports.  

 This was the tricky part. You place the canopy on top of the column, carefully inserting the Styrofoam circle (that you already placed on the center of the canopy bottom) into the columns center.   I got a glue gun and glued the columns top lip to the 8" cardboard cake circle. to secure it from tilting at all.  


And there you have it a carousel cake!  

(P. S. I got the shine by airbrushing it with a pearl finish)


Sunday, March 3, 2013

Carousel Cake

This month I was asked to make a cake for my niece who was turning 5 years old.  
She requested  a cake with horses and pink.  
Within a few minutes of thinking about it I really wanted to try to make a carousel cake. I had seen them before but didn't know how to make one, later I will post about how I went about making this cake.  

Here is Isabella's cake...


I like to add personal touches to the cakes, on the top of carousel I added gold 5's along the edge.  


The horses were fun to decorate with little saddles, and flowers along the body.  I steamed them to give them a little shine, to mimic the gloss found on wooden carousel horses. 


I added a name plate for Isabella with the year below.  This was made by using black food coloring as paint, and brushing on the name carefully.   

The top of the carousel was made about a week before, so that it was hardened enough to be stable.  
The top section and center pole are cardboard, covered in fondant.  


I was so excited to make this cake because it was unlike anything I had done before.
I hope she enjoyed the cake as much as I did making it.  


Happy Birthday!